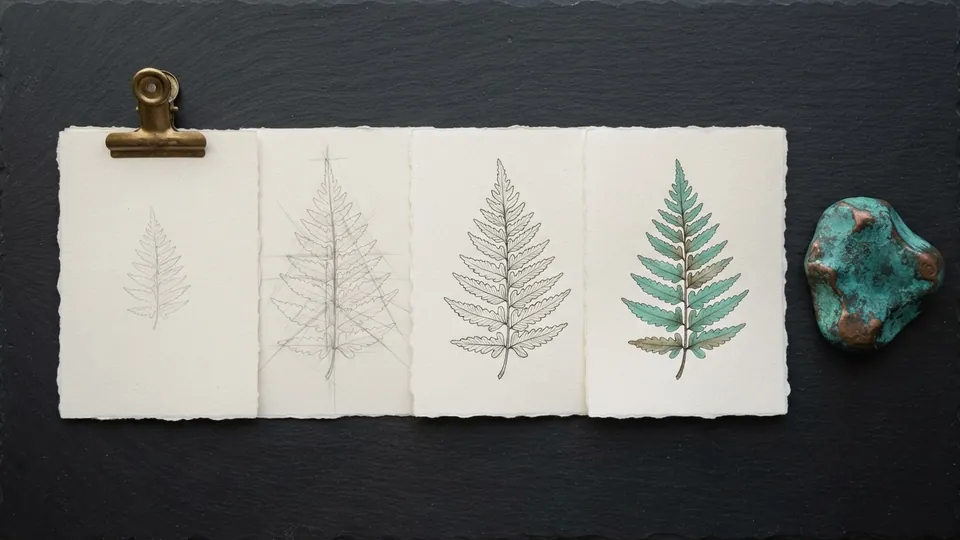
How to Document Your Art Process
To document your art process, switch on timelapse recording before the first stroke, save a dated file at the end of every session, keep thumbnails and construction sketches including the rejected ones, name layers by their job, and archive the layered master in two places. Authorship is proved by that consistent chain, which no single file can provide alone.
Nobody used to ask you to prove a piece was yours. Now a client wants reassurance that an illustration was not generated, a contest asks for work in progress files, and a stranger in the comments insists your painting is machine made. A working artist already produces almost all the evidence needed to answer; the problem is keeping it on purpose. This guide shows how to document your art process in a few minutes per piece: a file structure, a naming scheme, timelapse settings and a clear view of what the record can and cannot prove. It opens the process and provenance pillar.
Why an art process record beats any single proof
No single file proves authorship. A timelapse can be re-recorded by tracing a finished image, a layered file can be assembled after the fact, and metadata can be edited in a text field. What is very hard to fake is a consistent chain: thumbnails that match the final composition, a construction sketch whose errors were later corrected, layers that show the brushes you use in every other piece, and timestamps that line up across files, app history and backups. Only the person who did the work has that chain by default.
Art history already treats visible corrections as evidence. The National Gallery's glossary entry on pentimento describes an artist's changed decisions showing through a finished painting, read by conservators as proof of how the picture was built. Your rejected thumbnails and moved eye lines are the digital version.
Keep evidence from every stage, especially the early, wrong ones. A generated image has no wrong stages to show.
What to keep at each stage of the work
Six stages, one or two files each. Each file answers a different question a doubter might ask.
| Stage | Keep | File type | Why it is evidence |
|---|---|---|---|
| Thumbnail | The sheet of 6 to 12 small roughs, including rejected ones | Native file or PNG of the sheet, dated | The composition was chosen from alternatives; a generator produces none |
| Construction | Ball and jaw, wrapping cross, perspective grid, plus the corrected version | Native layered file (.procreate, .clip, .kra, .psd) | Corrections are the fingerprint of a human decision |
| Ink or lineart | Clean line layer on its own, unmerged, over the visible construction | Native layered file | Line weight and stroke direction match your other work |
| Flats | Flat color fills on separate layers, before any shading | Native layered file | Color was planned as shapes; generated images have no flat stage |
| Render | A dated copy at the end of every session | Native file per session, plus a JPG preview | A sequence of dated states, second only to the replay |
| Final | The delivered export and the full layered master, stored separately | PNG or JPG for delivery, native master kept private | Ties every earlier stage to the published pixels |
Native formats keep layers, blend modes and sometimes edit history. A .clip or .kra file that opens with the sketch layer at 30 percent opacity under the ink is harder to argue with than a flattened PNG. The construction method in anime head proportions from any angle leaves exactly this kind of layered trail.
Session saves and naming so timestamps tell a story
A folder of dated saves costs disk space and ten seconds per session. Put the date first so files sort in order, then a short title, then a session number. Two systems then agree, the name you typed and the modified time the operating system wrote, and that agreement is hard to fabricate later without leaving traces.
Create one folder per piece
Name it 2026-09-14_harbor-girl: ISO start date, underscore, short slug. Every file for the piece lives inside it.
Save As at the end of every sitting
Do not overwrite. Save As with a session suffix: 2026-09-14_harbor-girl_s01.clip, then _s02, _s03. A 12 hour painting produces four to eight of these.
Export a small preview beside each save
A 1200 px JPG named the same way, _s03.jpg. Previews open anywhere and make a contact sheet of the piece in a minute.
Write a three line note
A plain text file in the folder: date started, apps and brush sets used, references and any stock or photo elements. Honest notes about references answer the question before it is asked.
Leave the timestamps alone
Do not batch rename or re-save old sessions. If your cloud service rewrites modified times on sync, keep the original folder on the local drive and treat the cloud copy as the backup.
Sort the folder by name. If session numbers, dates and modified times all climb together and the previews show the piece growing in the order your method predicts, the story is coherent. That coherence is the evidence.
Turn on timelapse recording and leave it on
A stroke by stroke replay is the most persuasive artifact you can share, because it shows decisions happening in order, including the ones you undo. The Procreate Handbook's Video page confirms that time-lapse recording is on by default, that you can pause it without purging, and that export offers a full length replay or a 30 second cut. Clip Studio Paint and Krita both have a recorder you switch on per document.
Three settings matter for evidence. Never purge a recording to save space; the purge cannot be undone and the early frames show construction. Put reference images on a private layer where the app supports it, so the replay shows your drawing without exposing references or a client brief. Export the full length version to the piece folder, as well as the short cut you post; the full replay settles a serious dispute.
Name your layers like a working artist
A layered file with names like construction, construction fix, ink, flats, shadow multiply and light screen tells a story on its own, and mirrors the stack in layer blend modes for shading. A generated image arrives as one flat layer. A painting arrives as a history, and named layers make that history readable to a stranger. Keep the construction and thumbnail layers in the master, hidden, rather than deleting them at the end.
What a good record can and cannot prove
Be precise about the claim, because an overclaim is what a skeptic attacks. An art process record can prove authorship in a practical sense: it shows that a sequence of decisions was made in an order that matches a known method, with your tools, on your dates. It does not, on its own, establish identity or the absence of every tool.
| Question | A good record can show | It cannot show |
|---|---|---|
| Was this drawn by a person? | Rejected thumbnails, corrected construction, a replay with undos | That no generator was ever consulted for reference |
| Was it made by you? | Files on your drive, your brush set, your repeated habits across pieces | Legal identity; that needs a signed record or a witness |
| When was it made? | Session dates, modified times, app history, a full length replay | That dates were never adjusted, without a third party timestamp |
| Was it altered after publishing? | The master matches the export pixel for pixel | Edits to copies you never controlled |
For the gaps on the right the tools are different. A signed manifest attached to the export, described in Content Credentials and C2PA for artists, can bind your name to the exact pixels; the C2PA 2.1 specification also allows a trusted time stamp authority to countersign, which proves the signature existed at a given date. For what embedded creator fields survive an upload, and which to fill in, see image metadata for artists.
How to share proof without giving your work away
Share the least that answers the question. A 30 second timelapse cut, two or three work in progress crops at 800 px, or a screenshot of the layer panel usually settles it. Keep the layered master and the full length replay for a client, a contest jury or a platform appeal, sent through a channel you control. A client gets the master only if the contract says so.
Mistakes that weaken a process record
| Mistake | Why it hurts | Fix |
|---|---|---|
| Merging layers before archiving | The history collapses into one flat image | Flatten a copy for delivery, keep the master unmerged |
| Purging the timelapse to save space | The construction frames are lost forever | Export full length to the piece folder, then archive the canvas |
| Overwriting one file all session | One modified time, no sequence, no story | Save As with a session suffix at the end of every sitting |
| Deleting the ugly thumbnails | Rejected versions are the strongest sign of a human choice | Keep the whole sheet, dated, even the ones you dislike |
| Sharing the master to win an argument | Hands editable files to a stranger | Share crops and a short cut instead |
Document your art process in three habits
That is the whole method to document your art process and prove authorship when asked: record the replay, save a dated file per session with a name that sorts, and keep the early stages unmerged inside the master. Do it for every piece and the record builds itself. When a question comes anyway, the next step is what to do when someone says your art is AI, which uses this archive as its evidence.
Common questions
How do I prove my art is not AI?
Show the chain of process rather than one file: a thumbnail sheet with rejected versions, a construction sketch with corrections, dated session saves whose names and modified times agree, an unmerged layered master, and a timelapse replay. A single artifact can be faked; a consistent set across files and dates convinces.
How do artists document their process?
One folder per piece named with the ISO date and a slug, a Save As with a session suffix at the end of every sitting, a small JPG preview beside each save, a three line note of tools and references, and timelapse recording left on from the first stroke. The routine adds about a minute per session.
Does a timelapse prove you made the art?
It is the most persuasive single artifact, since it shows decisions and undos in order, but it is strongest beside dated session files and a layered master that match it. A replay can be faked by tracing a finished image, so a full length export with visible construction carries more weight than a 30 second cut.
What file format should I keep for work in progress evidence?
Keep the native layered format of your app (.procreate, .clip, .kra or .psd) for every session save, because it preserves layers, blend modes and sometimes edit history. Add a 1200 px JPG preview so the state can be viewed anywhere. Deliver a flattened PNG or JPG; keep the master private.
Sources and further reading
Primary references for the facts and definitions in this piece, all from independent publishers:
- Procreate Handbook: Time-lapse video: recording and exporting a canvas replay.
- The National Gallery: Pentimento: visible changes of mind as historical evidence of process.
- C2PA Technical Specification 2.1: the signed provenance record that can travel with a finished file.
This method is part of the process and provenance pillar. Pair it with Content Credentials and C2PA for Artists and How to Tell If Art Is AI: A Craft-Based Method.